Toki Medieval
Bespoke historical replicas
Authentic leather dyeing
Up until now I have used modern dyes to dye my leather, colour-matched to produce an authentic range of colours, but I wanted to experiment with authentic dyes to see how easy they are to make and use.
I therefore did some digging around and found references to the processes for making black and brown dyes. These are the most common colours we see in illustrations, painting and manuscripts. I’ve established that to get a red dye they used kermes, but this is hideously expensive and I don’t have any other information about the process, so that’s on hold at the moment.
Brown dye
Walnut shells are well known as a wood dye and I found references to leather dyed with them dating back to the 1300s. The crushed, roasted shells are soaked in water, giving a dark brown solution. The dye can then be rubbed into the surface of the leather.
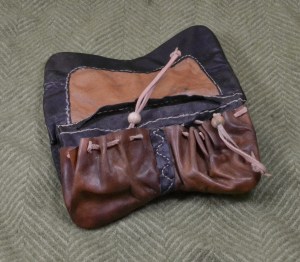
Two sections of the purse above are dyed brown: the front pouches and the inner lining. Although different shades, both were dyed with the walnut dye. The main difference between the two shades is the number of times the dye was applied: more applications gives a deeper colour.
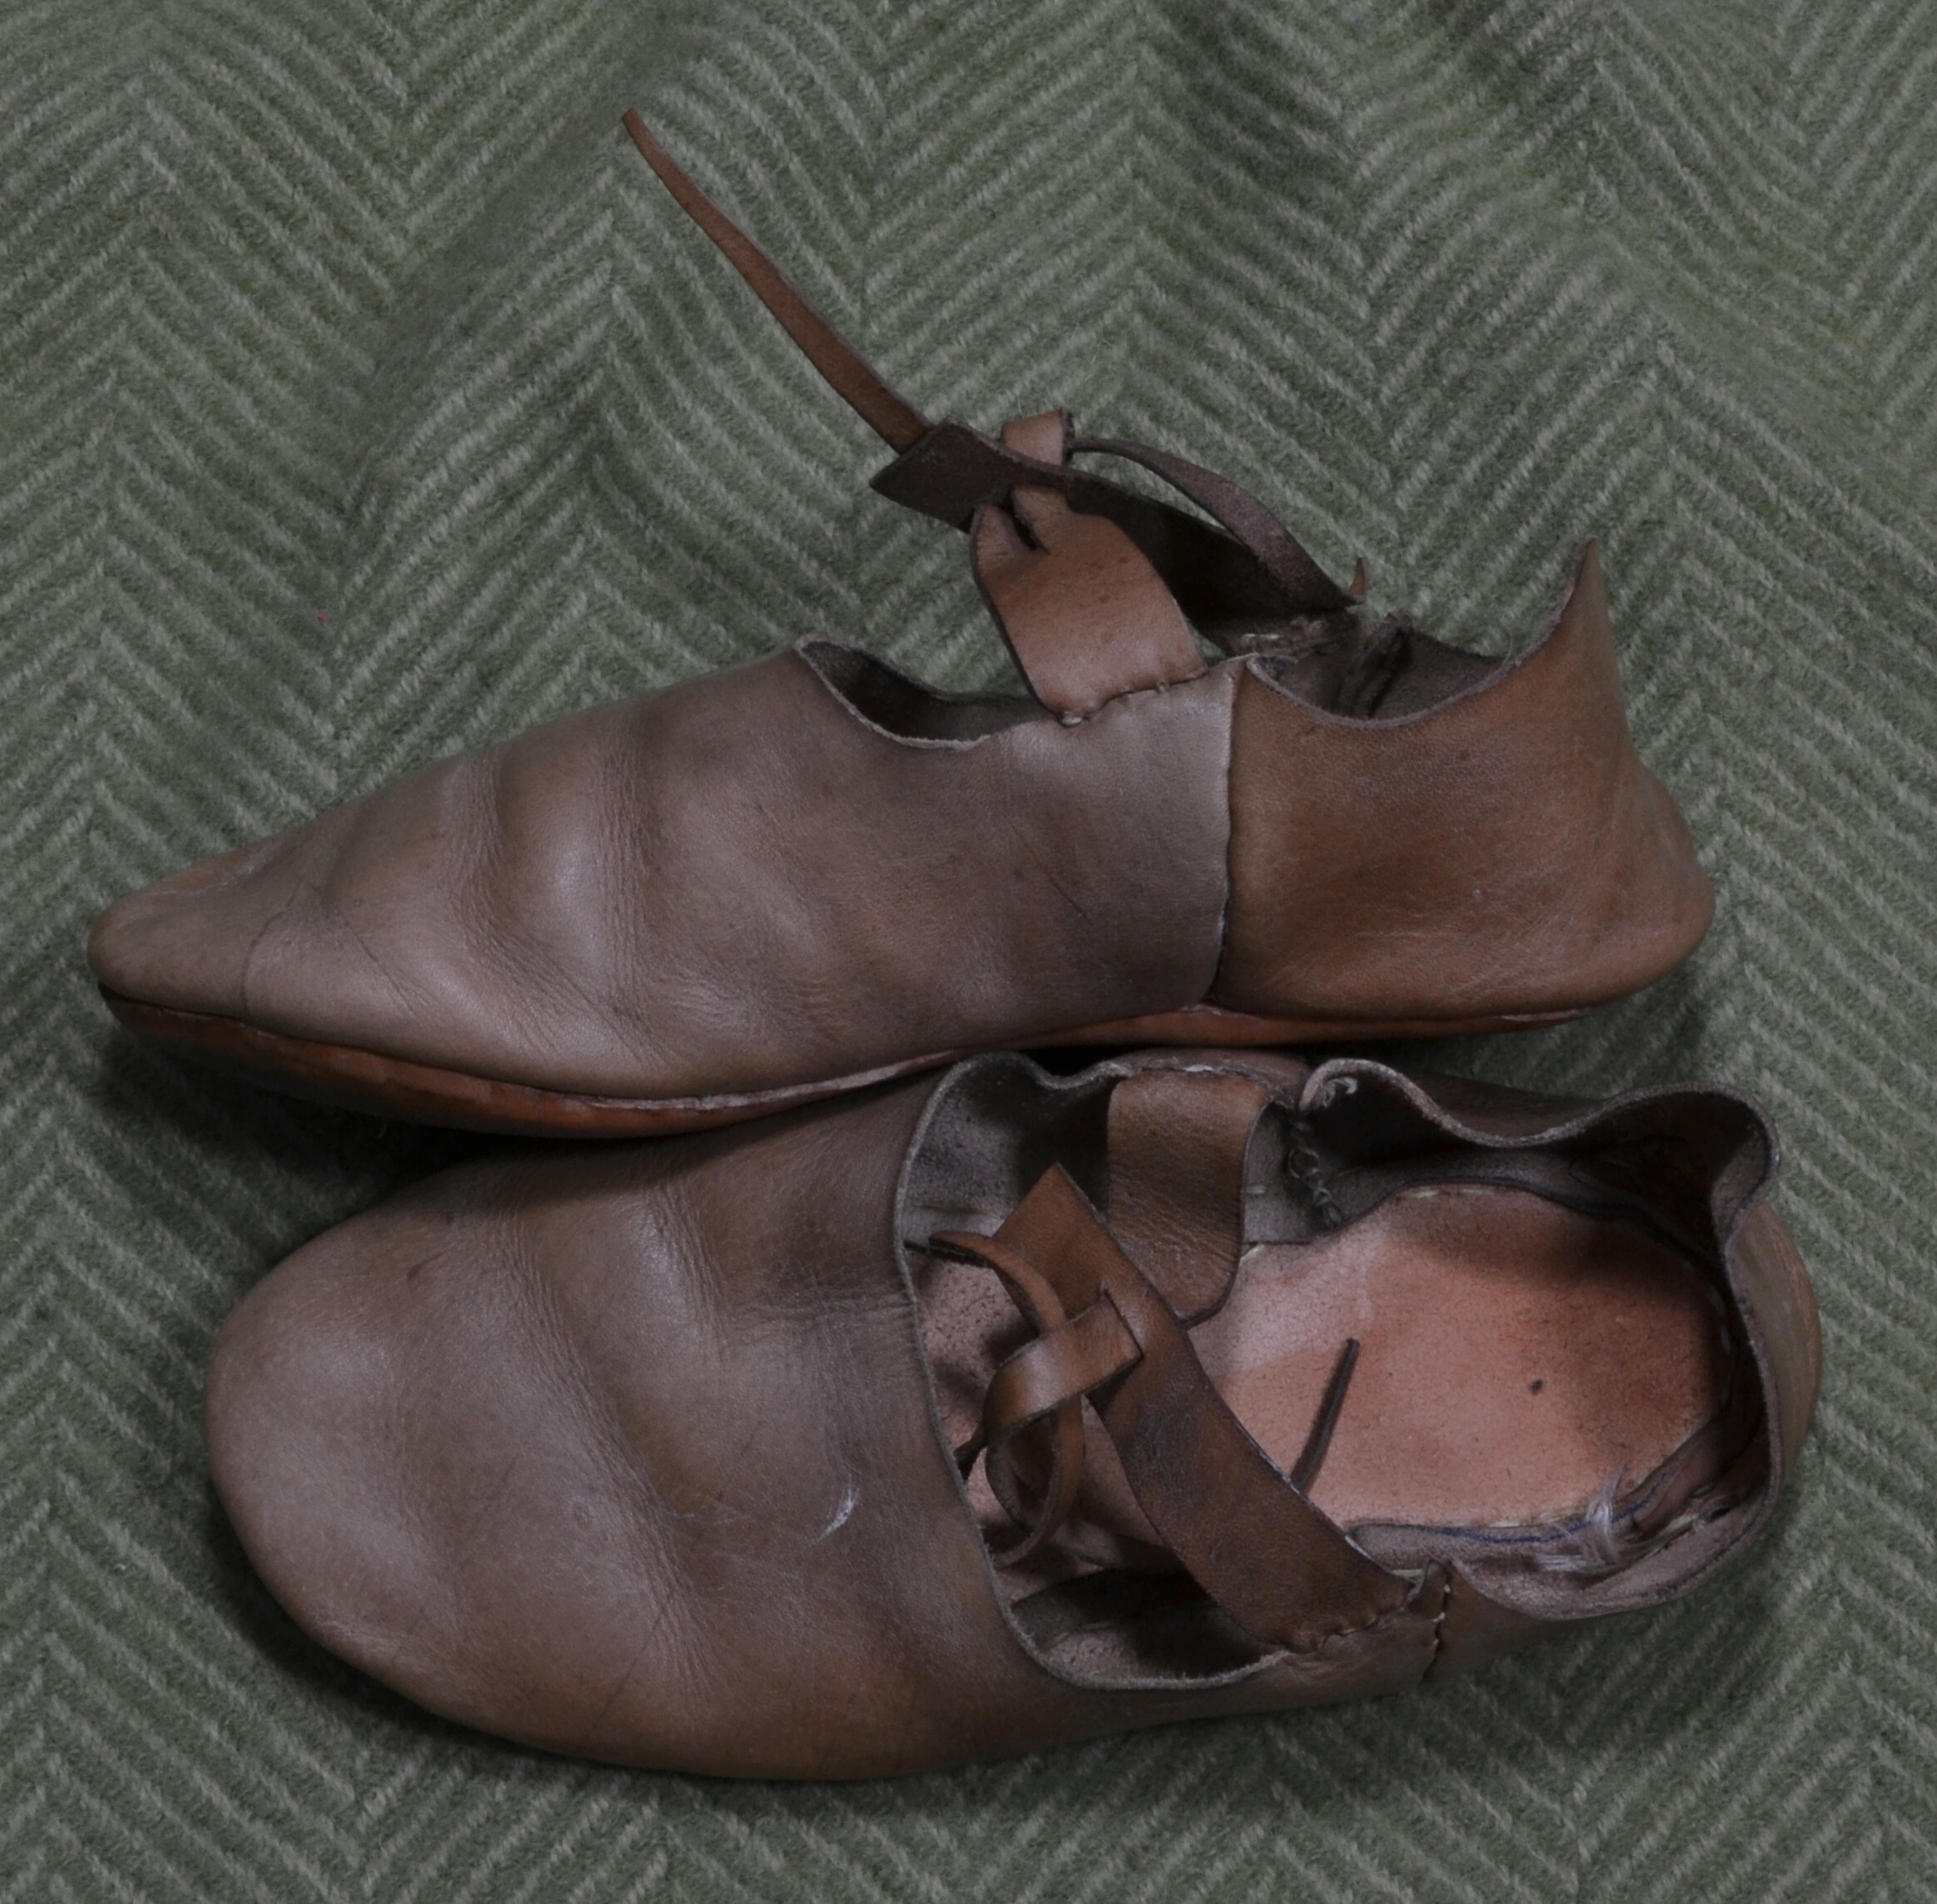
These shoes were also authentically dyed, but they were then soaked in water so that they would stretch around the owner’s feet. The walnut dye is not as colour-fast as modern dyes and a good deal of the colour leached out in water. After oiling they did not lose any further colour, despite going through plenty of puddles when in use.
Black dye
Black leather seems to have become increasingly common in the later Middle Ages, based on visual evidence from paintings (the Renaissance in art is well established by this point, so they are aiming to produce life-like colours). It is most common on pouches, belts and dagger scabbards, potentially for decorative effect. It seems to be rare on shoes, possibly because they wore out too quickly to be worth it (see below).

Fifteenth century illustration showing a black leather pouch and black belts
To dye leather black, you need acid, iron, and a tannin, just as you do when creating black ink. The leather has already got tannin in it from the tanning process and simply dyeing in an iron pot would provide the iron, just as dyeing weld in an iron pot produces green instead of yellow.
The purpose of the acid is effectively to rust the iron, however, so rather than damage a pot I soaked iron wire in a vinegar solution in a glass dish, and then submerged the leather in it. The impact on the leather was rapid: within an hour it was already turning a blue-grey. It dyed best when floating just below the surface of the water, presumably because it was more exposed to the air. Where layers of leather overlapped, the lower layer didn’t dye as well.
I took it out after two weeks as if you leave it in too long, the acid will eat away at the leather, causing it to decay. At this point it was a deep blue-black which, after oiling, came up as the intense black shown below. Unlike with a modern dye, iron and vinegar turned the leather black right through, rather than just the surface.
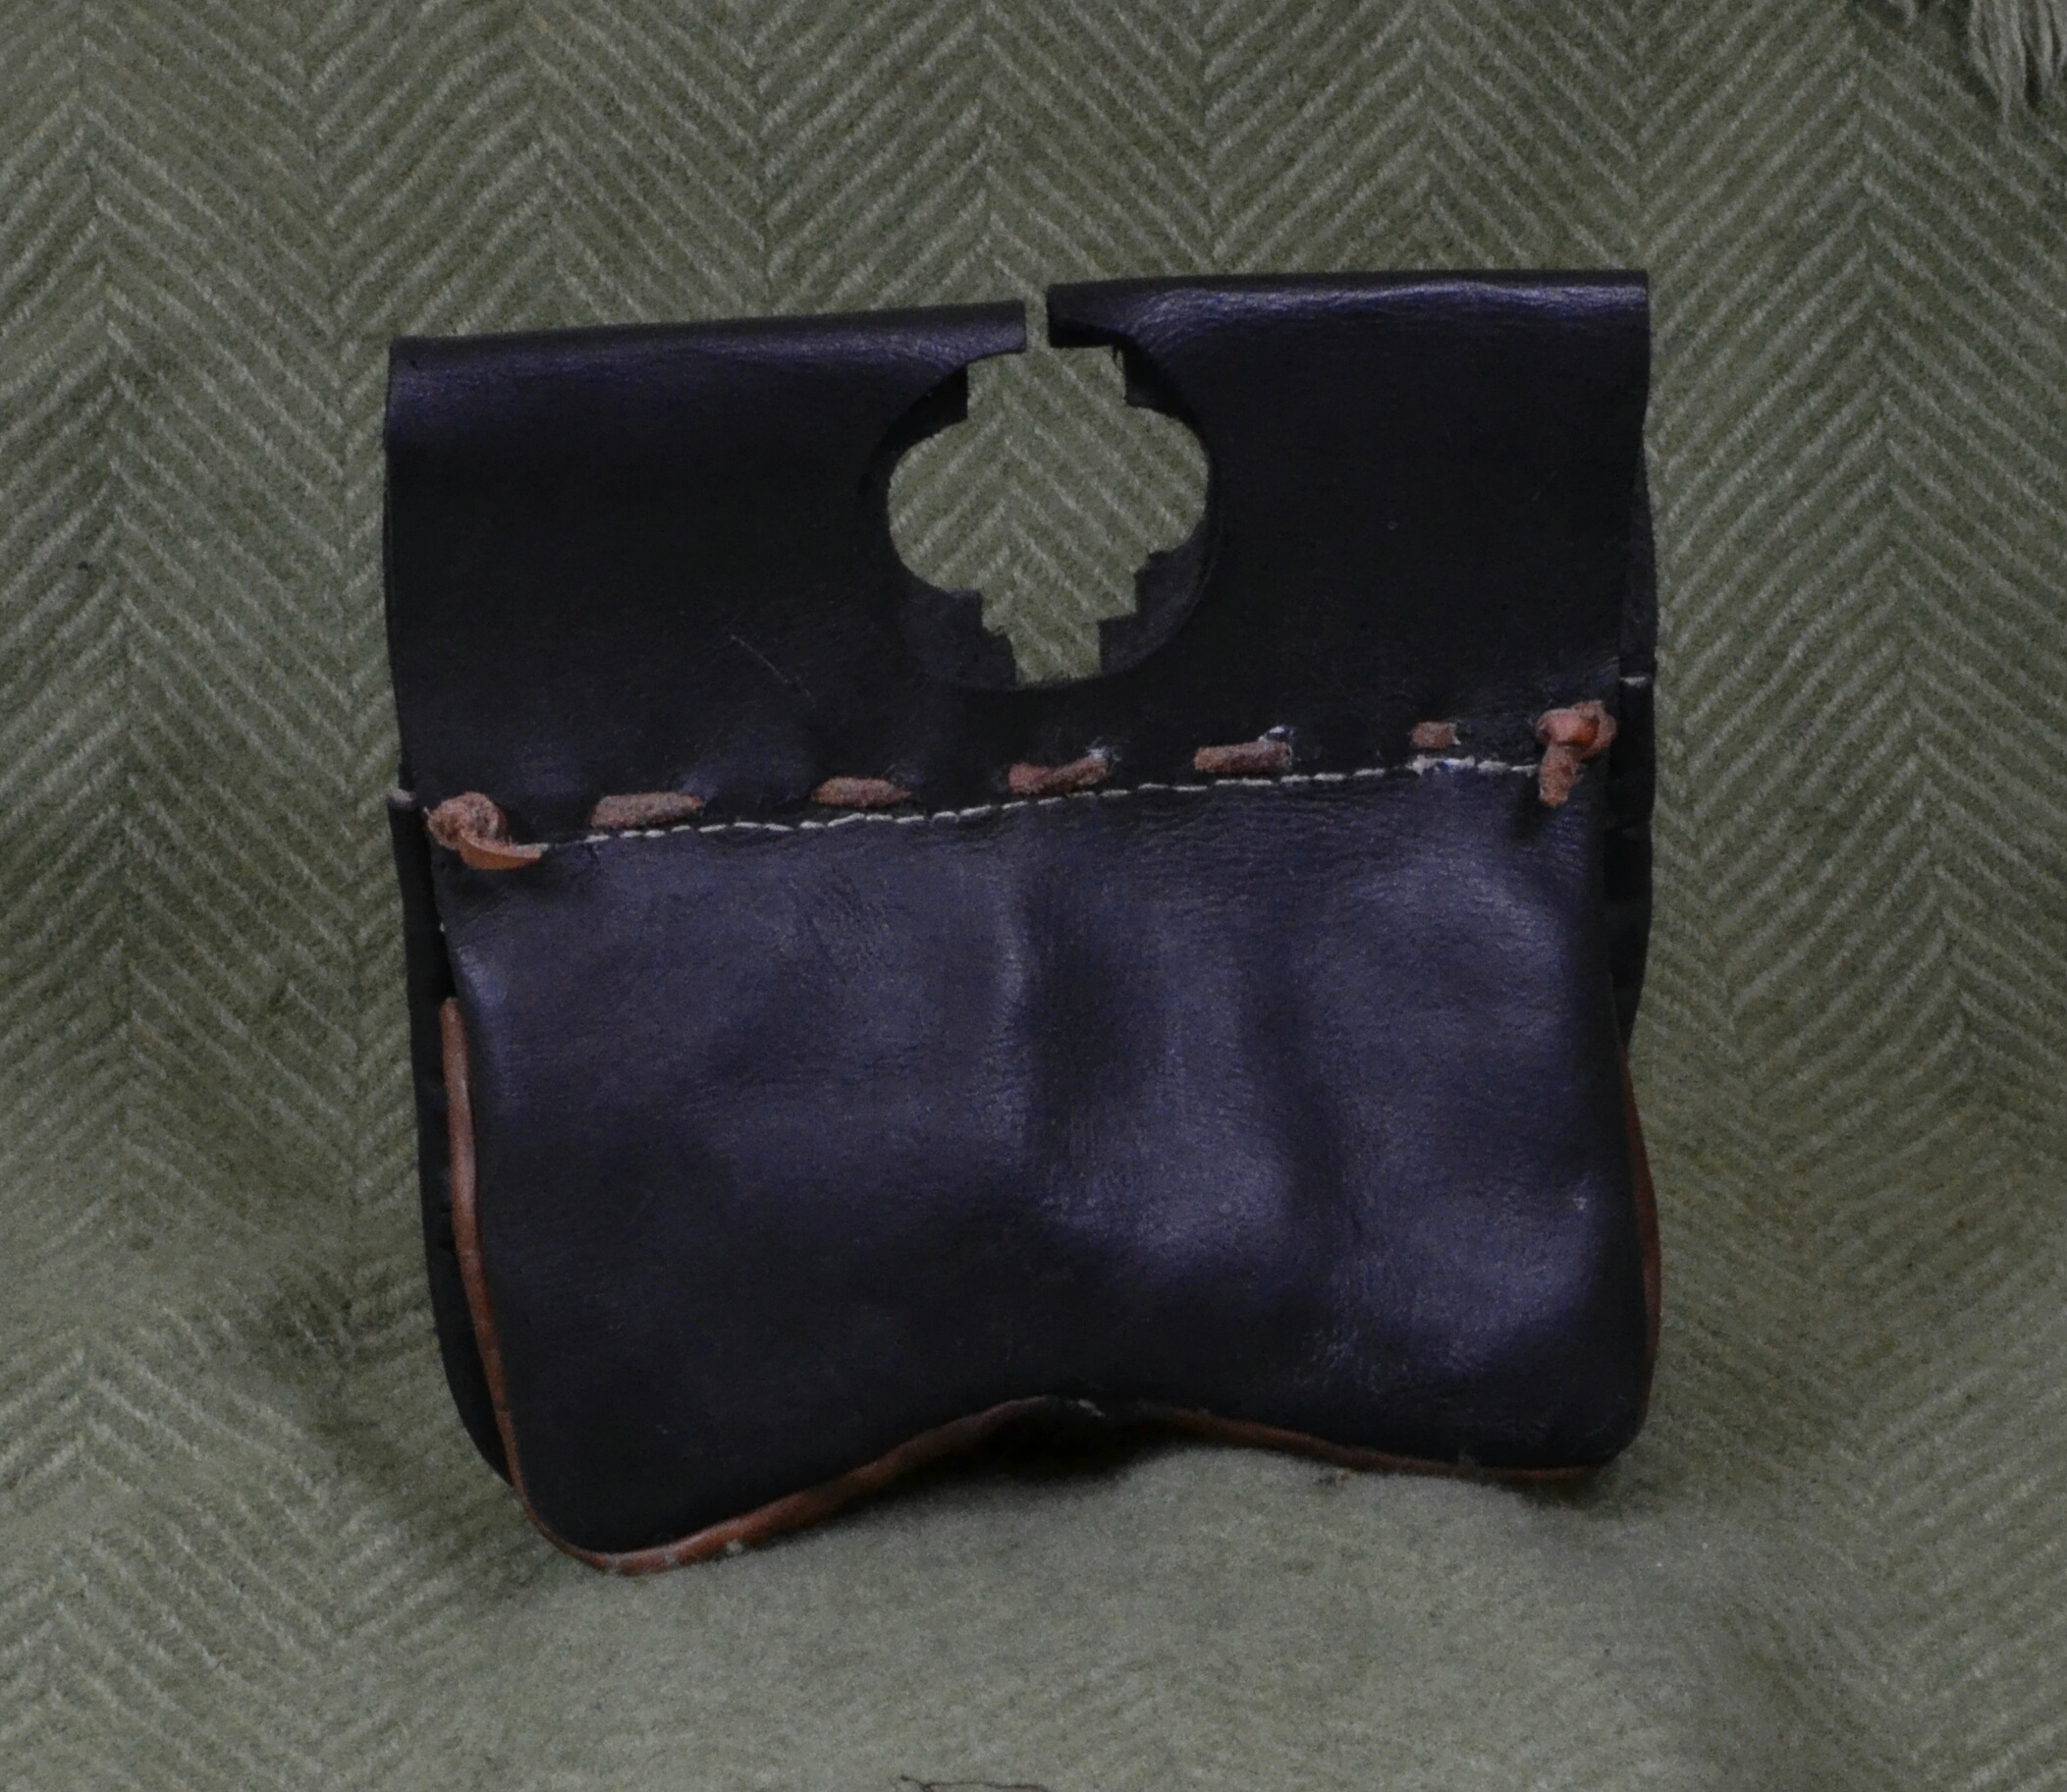
Rear of girdle pouch, showing black dye.
I mentioned above that it may not have been worth dyeing shoes black because they wore out too quickly. As it took two weeks to get a deep black, black leather would have been very expensive and therefore not worth using on a comparatively short-lived item such as shoes.
Wearing and caring for your period shoes
A period fit
Wearing period shoes feels very different to wearing modern shoes. We are all used to mass-production shoes cut to a standard pattern which we consequently tend to buy slightly bigger than we really need e.g. because one foot is slightly wider than the other. (It could be worse: it was only in the twentieth century that the army started providing left and right shoes. Prior to that it was a case of one foot fits all.)
I only make shoes to order, so your shoes will be fitted exactly to your feet. This means they may not both be exactly the same shape! I also make them so that they fit snuggly. Leather is an immensely malleable material which can stretch by up to 20% as it as used. If I made them to fit loosely the way modern shoes do, then the inherent stretch means they would be falling off your feet after a season.
If you would like to stretch your shoes before wearing them to a show, then just put them on, damp them, and walk around in them for a few hours.
Protecting your shoes
You can add waterproofing by applying a mixture of beeswax and oil (or modern equivalent) to the uppers and letting it soak in. Don’t coat the sole: it will make them very slippery! You should do this roughly once a year to feed the leather and keep it supple.
If making up your own mixture, avoid walnut, almond, linseed or Danish oil as these will dry your shoes out. Neatsfoot oil should also be avoided as it can decay linen and your shoes are likely to be sewn together with linen thread. Fortunately vegetable oil and olive oil are both good to use and widely available.
If you would prefer to buy waterproofing then I’ve had good results with Dubbin, although do read the label to make sure they haven’t added anything odd since I last used it.
A word of warning: direct heat irreparably damages leather, so if you get soaked at a show don’t put your shoes on the firebox to dry. Home radiators or fires will have the same effect, so if you want dry them, just leave them to air dry in a warm, but not hot, place.
A second word of warning: leather shoes will go mouldy if left damp for a prolonged period of time. Do not forget to unpack your shoes and leave them out to dry after a show!
If you do accidentally leave your shoes in a plastic bag between September and May, only to retrieve a set of blue furry objects the night before the show, then you should soak them in clean (not soapy!) cold (not hot!) water and gently scrub off the mould. Leave them to dry then re-oil them as above. The reason you need to avoid warm water is because this will harden the leather, making it brittle and potentially shrinking the shoes.
Much of my research is done by looking at historical finds and at illustrations.
Finds are the ultimate physical evidence of past objects, but they are often in poor condition, or the context of the find makes it difficult to interpret in terms of who it belonged to, how common it was, or how it was used. Furthermore, as we rarely get the opportunity to view the actual object, it is easy to be misled as to its size. 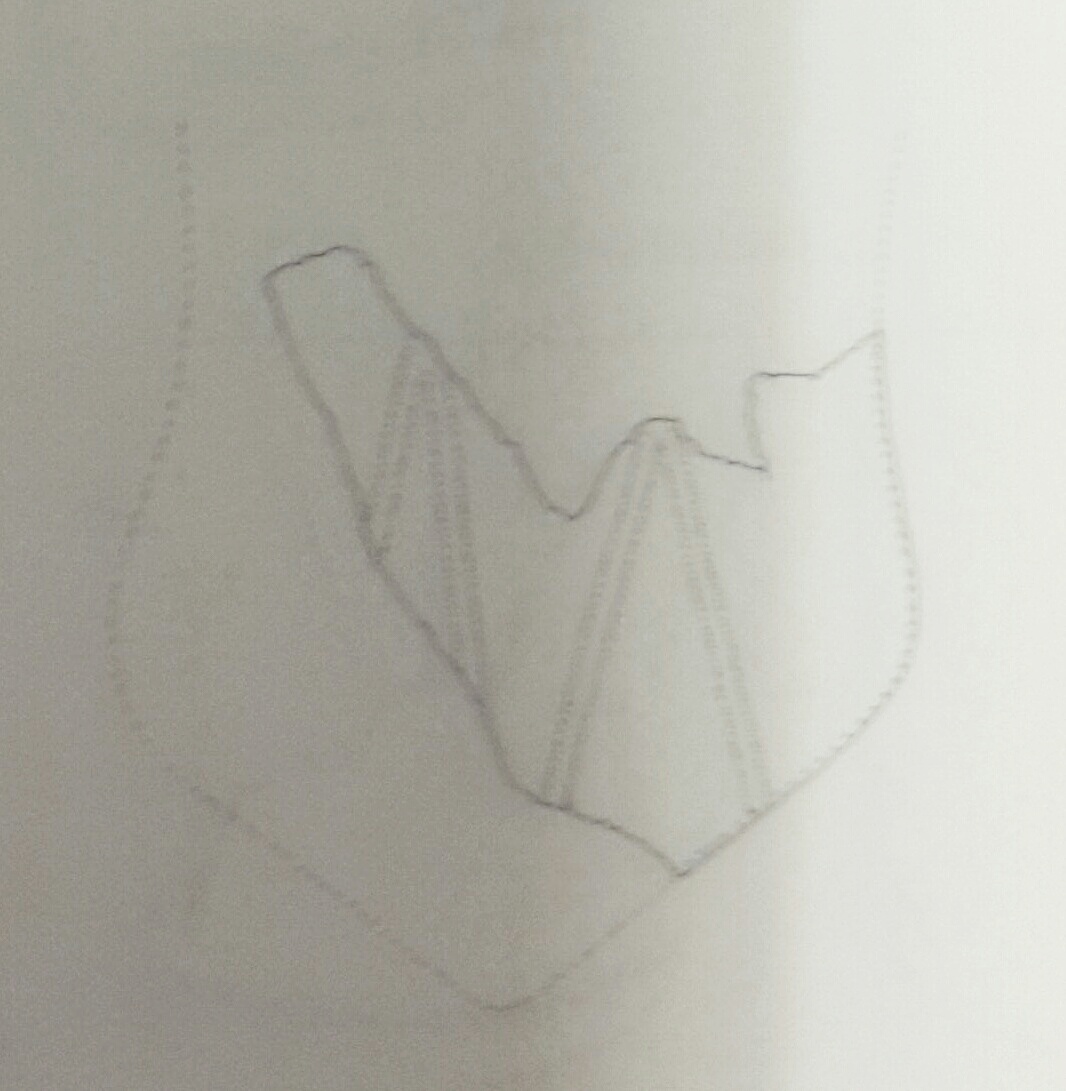
The above is a photo of the archaeological report for a sixteenth century Dortrecht find. The dark lines show the shape of the actual find. The dotted lines show the estimated shape. Can you guess what it is? It’s a fragment of a purse.
In contrast, however, illustrations are good at showing us how objects were used and who was wearing them, but artistic licence, fashion, and the purpose of the illustration all mean that they are not necessarily a faithful representation of the physical object.
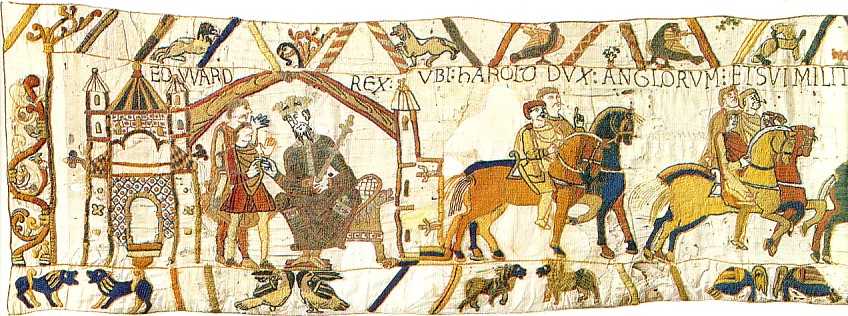
The above image is a photo of the Bayeux Tapestry. Among other things, note the blue-legged horses, and the buildings only marginally bigger than the horses. Useful, but hardly a definitive representation of “how things were”.
Over twenty years of re-enactment I have built up a rather large library of images of both types, both in books and through photocopies. When I say “large” I do mean that literally: it takes up a lot of space!
Happily, this year I discovered Pinterest, which makes it far easier to store collections of images without requiring the purchase of an additional room to house them all. If you are interested in seeing some of the sources I use, you may like to follow me, in particular my fifteenth century and early medieval boards.
What’s new 2013
It is, of course, no longer 2013 and therefore this post is very belated. I’m still here and still busy making historic replicas, but 2013 was a busy year which amongst other things included a house move, so sadly, blogging took a back seat.
One of the highlights of 2013 was meeting and joining Sir John Savile’s Household. They are a lovely fifteenth century (Wars of the Roses) group and joining them has given me the perfect excuse to have a lot of fun making all those objects that we just don’t have evidence for earlier on.
With that in mind, I’ve updated this site with a number of new products:
- Fifteenth century shoes and boots
- A fifteenth century girdle purse
- More bracers
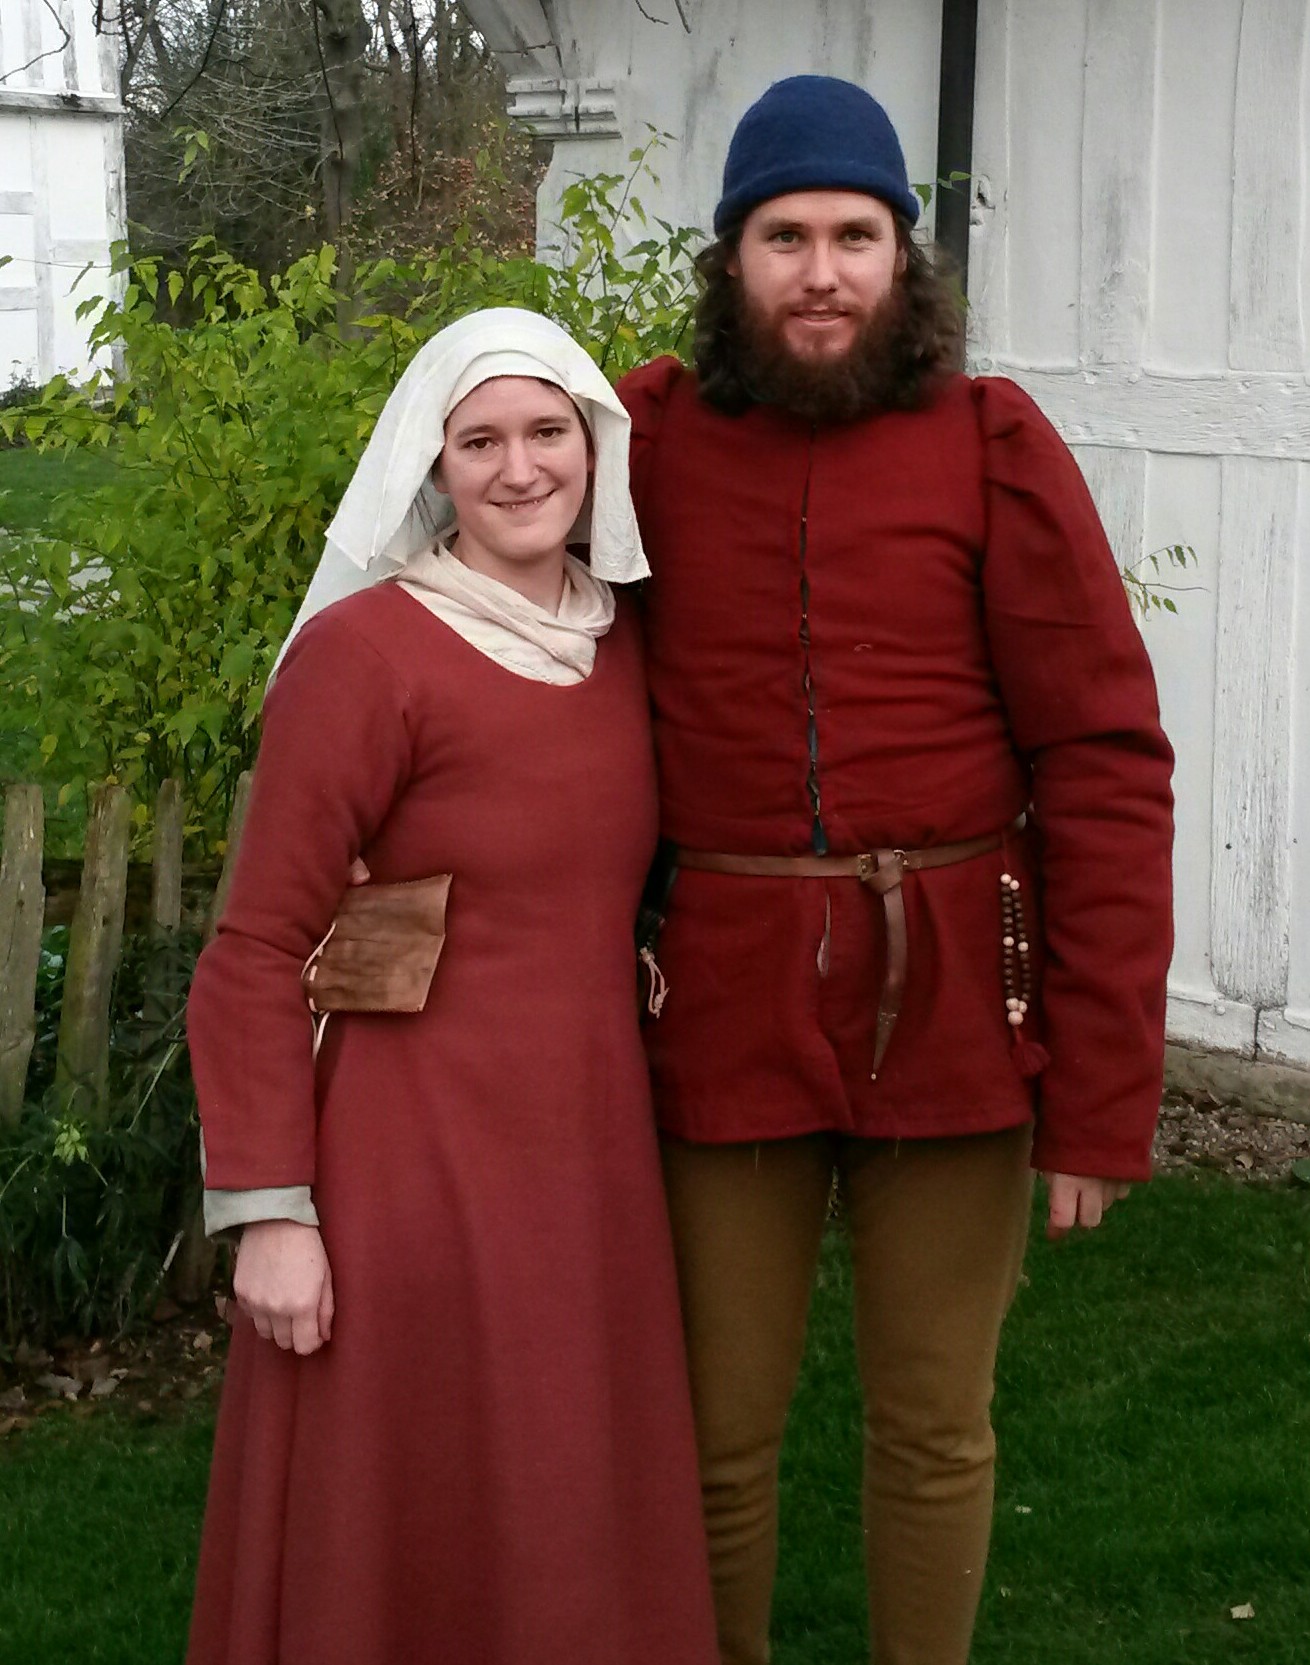
A new period of course means a whole new set of soft-kit (or in my case, re-making, since I have expanded slightly since I last made fifteenth century kit). All of the clothes shown in the photo below were researched and made by me personally over the course of a month.
2013 also saw me making a Victorian gentleman’s suit to wear to my sister’s wedding, shown below.

If you would like to commission soft-kit for any period, please do get in touch to discuss your requirements.
Why I don’t paint my leatherwork
I had a question from a reader about my post on seax and knife scabbards: why didn’t you talk about how they were painted?
Short answer: because they weren’t.
More nuanced answer below…
Do we have any finds of painted leather?
Yes. We have finds of painted leather-covered shields from the Roman period onwards. Parchment is also made of leather and this was of course painted, both with ink when writing and for decoration. The twelfth century writer,Theophilus, mentions painted leather screens in “On Divers Arts” (a treatise on painting, glassmaking, and metalwork), and implies that they have been around a long time. In the later medieval period we also get finds of painted leather boxes.
All of these items, however, are rigid objects with no flex in them. The only find we have of painted leather on clothing or personal items is a thirteenth century strap found in York. Crucially, this is found several layers above early medieval finds which do not show any evidence of painting, indicating that the reason we don’t find paint on other leather items isn’t simply because it hasn’t survived the ground conditions.
Notably, this York find is painted in the recesses of the decoration rather than on the relief, probably because it was less likely to rub off there. Paint is likely to survive in the recesses if anywhere, yet we have elaborately decorated scabbards from the nineth century to the sixteenth century, from all over Britain, which don’t show any evidence of paint.
Why weren’t they painted?
All paint essentially consists of pigment to provide colour, plus some kind of glue to make the paint hold together and stick to objects. Until the Renaissance, the binder was made from e.g. milk, lime, or egg, all of which are inflexible when dry. If these paints were applied to a surface which bent or flexed, the paint would simply flake off. Paint was extremely expensive because all pigments except certain reds, yellows, whites and blacks had to be imported from outside Europe. Painting shoes, scabbards or bags was therefore an expensive way to throw away money.
Even when oil paints are developed in the 13th/14th centuries, however, painting flexible items is not common. Painting leather has only really become common with the introduction of modern (acrylic, enamel) binders in the 19th and 20th centuries.
Was leather in Britain coloured at all?
Finds which come out of the ground certainly show a range of colours, mostly brown.
Different tanning methods produce different colours of leather. What we now call vegetable tanning produces much paler leather than, for example, oak tanning, which produces very light to very dark brown. “White” leather is also mentioned as being used in high status gloves, although note that we don’t know what colour “white” leather actually was. This probably means a very pale leather, but the precise shade is unknown.

Vegetable-tanned leather – note the pinkish tint

The uppers of the shoes above are veg-tanned, but have been dyed to resemble the colour obtained from oak-tanning. The orangey soles are actually oak tanned.
Waxing and oiling leather will also change its colour, as does use, as shown in the shoes below:

It is also entirely possible that leather was dyed, since we have evidence of leather being dyed elsewhere in the world throughout the period, but to my knowledge none of the published research into British finds includes the necessary chemical testing to know for sure.
Finally, some of the York finds show evidence of a border around the top of the shoes, sometimes from a different leather and sometimes just with the hair on the outside rather than the grain. After 1500 years in the ground, these pairs of shoes are pretty uniformly brown, but it possible that this is evidence of different coloured leathers being used for decorative effect.
Plea for more research
Comparatively little has been published on leather finds. Although you can learn a lot about which items were made from leather, how they were constructed, and what patterns they were decorated with just by looking at finds in museums, and although you can do experimental archaeology to find out e.g. what happens if you paint leather with period paints, detailed information about dyes, tanning methods and other treatments can only really come from chemical and microscopic analysis of the finds. If you know of any publications dealing with this or any research in progress, please let me know!
A brief guide to medieval knife and seax scabbards
From the earliest finds to the sixteenth century, knife scabbards are decorated. They are civilian items rather than wargear, expressing personal taste and fashion. Finds range from those clearly decorated by skilled craftsmen to the rather inexpert efforts of someone tarting it up at home in an attempt to keep up with Sven from next door’s new scabbard.
Construction
Larger (7″ upwards) early medieval seaxes are suspended horizontally from two loops with the cutting edge facing upwards.

The scabbard is “closed” (i.e. the two edges are joined) above that top edge. In Britain this is usually done by stitching and riveting, as shown on the right of the image below. Smaller seaxes hung vertically from a single loop and were frequently closed by stitching along the back of the blade, as shown on the left.

Where the seax is top-closed, the top edge is usually riveted because stitching could be cut by the blade inside. Some of the York finds have washers below the rivets and interestingly, if the washer is made of a ferrous material then the rivet itself is non-ferrous and vice versa.
Some Scandanavian finds have metal edges along the top closure, as shown below, but there is no evidence of this in any of the British finds.

Post-Conquest, fashions change with the horizontal seax falling out of use and knives of all sizes hanging vertically with a back closure.

Form
In the early medieval period the underlying design for the decoration of seaxes follows a distinct form, dividing the scabbard into seven sections which are then decorated.
The front of the scabbard is divided into four: the handle, the blade, the gap in between, and a top ridge, as shown below.

Perhaps surprisingly since it would rarely be seen, the back of the scabbard is also decorated, albeit less elaborately. The back is divided into three sections: handle, blade, and gap.

Smaller knives are consistently divided into handle and blade sections, but there is much greater variety in what else is decorated.

Post-conquest the style starts to shift and the gap and ridge decoration are lost, leaving just the blade and the handle. This goes hand in hand with the change in how the the knife was worn: the handle is now the “top”.

Patterns
The two main British collections of early medieval finds are from York and from Dublin, and although they all follow the division into seven sections, the actual patterns embossed in those sections differ.
The Dublin finds tend to show mostly geometric patterns such as triangles, crescents and straight lines, as in the image below, whereas the York finds tend to show interlacing and knotwork.

Note that neither style of decoration appears on wargear such as shields or sword scabbards: they are practical items which show no significant levels of personalisation.
It is tempting to see the differing patterns as evidence of regional variation in fashion, but it isn’t certain that that’s the case. We know that there was extensive trade between York and Dublin and style and method of construction suggests that some of the Dublin scabbards came from the same workshop as one of the York ones, so there must have been substantial cultural exchange between the two. The differences may therefore come down to two different craftsmen’s styles, rather than regional variation.
Geometric designs continue to be common until decorated knife scabbards go out of fashion, but we have very little evidence for zoomorphic and foliage patterns such as those shown below before the late tenth century.

Once zoomorphic and foliage designs become more common, we can also see much greater variation in artistic fashion, if only because there are many more ways to draw a tree than a square. As a result artistic designs are often used to date later finds, although how reliable this is is left to the reader to decide.
Decorative technique
Early medieval leatherwork is all embossed, with stamping coming into regular use post-Conquest. These continue to be the primary methods of decorating leatherwork, because the more modern technique of engraving (i.e. cutting) can weaken the leather. Not only does embossing create relief, but also darkens the leather where it is compressed.

Embossing is a very simple technique, which can be done by anyone of any age. It makes an easy activity for bored children on site, requiring few materials and limited potential for injury!
The leather must be slightly damped, e.g. by rubbing a wet finger across it. Don’t spit on it or spill water on it as it will get too wet, and when wet it is easy to inadvertently tear or punch through the leather and weaken it.
The design is then impressed into the leather using a blunt point. At home, a darning or knitting needle will do the job. On site, the tip of a bone pin should be pointy (yet blunt) enough. The goal is to press into the leather, not to scratch, cut, or puncture it.
And that’s it! Happy embossing!
Chaos Space Marine Army
Painting models is easy compared to photographing them. I finally got my hands on some new photographic equipment this week, so here’s the fruit of this week’s labours: photos of a 28mm scale Chaos Space Marine Army I’ve just finished painting.
Chaos Lords

Chaos Terminator Squad

Chaos Obliterators

Chaos dreadnought

Chaos Havocs

Replica based on the Seedorf shield
Up until the turn of the millenium shields were either painted in a single colour or had simple geometric designs such as quadrants. There was no need to decorate them extensively as they were disposable items which would be unlikely to last a battle, rather than valued items which the owner customised. The design shown in the shield below is one of the most elaborate patterns we have evidence for (from an early eleventh century manuscript).

From roughly 1040 onwards, teardrop shaped shields (kite shields – shown above, between two round shields) start to appear, which offer greater body protection than the earlier round shields and can more easily be used from horseback. Our first records of kite shields come from some Northern French bibles, showing kite shields painted in a single colour or with two colour crosses. In the Bayeux tapestry most shields continue to be painted in this way, but some of the high status Normans are depicted with simple zoomorphic designs such as birds and dragons.
During the twelfth century kite shields become flat-topped as a result of changes in fighting style and fashion, and during the thirteenth century they also become smaller, because the increasing use of plate armour means you don’t need as big a shield. By the end of the thirteenth century shields have become what we today call a “heater” shield.

The early zoomorphic designs had also become a key part of the heraldric system and shields were decorated as a way for rich individuals to ostentatiously display wealth, and to show the allegiances of their retainers.
One of the only surviving examples of a shield from this period is the Seedorf shield (1180-1225), shown below. This particular shield has clearly been cut down from its original size, possibly so it is in the most fashionable shape. It is decorated with a silver-gilded raised lion design.
One of my recent commissions has been to make a planked shield based on this design for novelist Elizabeth Chadwick. The shield itself is constructed as discussed in my post on the construction of planked shields.
The relief design is formed using one hundred and forty individual leather strips to create raised areas:

The completed design before covering and painting:

Once the design was complete, I covered the entire shield in leather and painted it blue. In the medieval period, blue was most commonly obtained using lapis lazuli, but due to its high cost only the very rich could afford to use it in large quantities. As lapis is just as expensive today, this particular shield has been painted with a modern equivalent.
The relief design was then gilded in gold leaf (the original is gilded in silver):

A brief guide to early medieval shoes
Shoe construction over time
In the Roman period shoes had separate soles which were hobnailed to the upper, and from the late sixteenth century shoes were welted, i.e. the sole was attached to the upper using a leather strip. In the intervening period, shoes are “turned”, which means that the upper and sole are sewn together while the shoe is inside out, and the shoes is then turned the right way so that no stitching is visible on the outside of the shoe, protecting the stitching from wear. The shoe pictured below shoes a shoe turned out so a new sole can be attached.

In Britain, we have a large number of finds dating from 850 onwards. Shoe styles from 850 to the Norman Conquest seem to change very little. Pre-Conquest, there are two basic types: Scandanavian period shoes tend to have a V-section heel extension on the back of the sole stitched into the back of the shoe, but between 900 and 1000AD this changes to a round, “modern” shaped sole with a heel stiffener, possibly simply because these are easier to produce than the earlier style.
V-section heel:

Round heel:

Heel-stiffener:

At roughly the same time, toggles seem to fall out of fashion as a means of fastening shoes, and drawstrings become more common. Throughout this period, shoes mostly come up to the ankle bone or lower.
Draw-string fastening

Toggle fastening

The toggle itself

As with many aspects of life and clothing, post-Conquest shoe styles appear to change frequently, presumably according to court fashion. Over the course of the following five hundred years shoes will vary significantly in height, length, fastening style, and practicality.
Below is an example of a post-Conquest boot. As you can see, unlike earlier styles this would come to above the ankle.

Make it, mend it
Although it seems likely that in towns shoes were frequently bought from shoemakers, some would have been produced in the home, and many would have been repaired at home. Many finds show signs of repair, and in fact many finds are of the sole alone, because uppers tended to last longer and therefore several soles might be wear out and be discarded for each upper. Large numbers of soles were repaired with a “clump sole”, i.e. by simply patching the hole. Other repairs include patches sewn into uppers, and toggles moved and slits added to improve the fit. Even once a shoe had reached the point of no return and could not be mended further, the leather itself would be reused for e.g. small knife scabbards and an archer’s brace. Other shoes show signs of adaptation for foot problems, primarily by slitting the upper or cutting sections out of it to relieve pressure on sore areas.
Planked shields
Modern re-enactment shields are typically cut from sheets of exterior grade ply as it is strong, durable, and widely available. Throughout the medieval period and beyond sheets of wood had to be constructed from planks of wood glued together, as the width of wood available was dictated by the size of the tree.
Unlike a modern re-enactment shield, early medieval shields were disposable, and designed to catch weapons rather than to withstand repeated blows across multiple battles. As a result of this, a professional warrior would have taken several shields to battle.
With this project, my aim was to produce a shield I could use for re-enactment combat using traditional techniques and materials. Historical shields were typically made from solid planks between 5mm and 10mm thick, but in order to withstand extended use, I needed to produce a more strongly constructed shield from ply-ed wood. Although there are no early medieval finds of ply-ed shields, a Northern French manuscript from the period describes shields constructed of ply-ed wood, and it was this technique which I used.

The shield shown above is 30 inches in diameter, which is at the top end of sizes from the archaeological record. It is based on a 2008 Danish find of an incomplete shield. The shield is covered with 2mm thick leather, again as per archaeological finds and written records.

The shield is constructed from three cross-laminated layers of seven poplar planks. I used poplar because it is the most common wood used in current finds. The planks are glued together using a casein-based glue (cheese glue).

Unlike the majority of re-enactment shields, the grip and boss are attached using clench nails rather than rivets and the grip is attached separately to the boss. This technique is based on archaeological finds.

You must be logged in to post a comment.